The Best Podcast Equipment for Every Budget
Contents
Author
Steven Bonnard
Head of Marketing
Hi, I'm Steven. I'm a globe-trotter who loves running long distances and listening to podcasts, especially from the news, politics and fantasy categories.
At a Glance
The essential equipment required for a podcast includes a microphone, wired closed-back headphones, pop filters, boom arms, recording software, and audio interfaces for XLR setups.
Equipment choices depend heavily on your budget, podcast format, and recording environment.
USB microphones are cost-effective for beginners, while XLR setups provide higher quality for professional multi-mic recordings.
A host platform is necessary to store and automatically distribute episodes across directories.
Investing in essential equipment can either make or break a podcast. Whether you’re about to start a podcast, are in the early stages, or need to upgrade, sourcing the right gear without making big mistakes can be difficult.
In this article, we break down the hardware and equipment that every podcaster needs. We've also included top recommendations from the team who use this stuff daily. By the end of this post, you’ll know exactly what’s worth spending money on and what isn’t.
What to Consider Before Purchasing Podcast Equipment
Podcasting can be as simple as hitting a record button and editing the audio slightly. It can also be as complex as having a fully equipped sound studio with all the top-grade hardware.
Thankfully, even the average podcaster can find many budget-friendly options that can produce excellent audio results without the huge expense. But, before you buy what you think you need, it's worth asking yourself a few questions and then investing in what you actually need.
What Is Your Budget?
Larger businesses may have a more robust budget to invest in gear, whereas an individual podcaster often does not. The bigger the budget, the better quality equipment you can buy.
However, there is one thing to consider. Even with a smaller budget, you can still get to where you want to be with your podcast production. Plenty of podcasts started out on a shoestring budget, with their built-in microphone on their laptops or just a simple USB microphone.
Take stock of how much you are willing to invest in your podcast gear. Usually, a podcast setup will consist of a microphone, headphones, and recording software. Do you have the capacity to put $100, $1,000, or $10,000 towards your podcast?
Understanding this particular point will help you buy the necessary equipment rather than overspending on items you want. Remember, you can always upgrade your podcast studio later on.
What Is Your Podcast Format?
A podcast format is how a podcast's content is organized and structured. Some examples are an interview-style show, monologue (known as a solo-cast), panel show, or a narrative podcast that favors rich storytelling and editing.
Each of these formats requires a specific setup and, therefore, specific equipment and hardware. For example, what you need to get started as a solo cast are only a few items: a mic and stand, headphones, and a laptop.
However, for a panel show or narrative podcast, the scope for buying more equipment gets bigger. Usually, you will need more than one mic (plus stands for each), a sound mixer, multiple pairs of headphones, etc.
Another important factor is whether you plan to record your podcast in one place or move around. If the latter, having easily portable equipment can make all the difference. So, think about the type of podcast you're looking to create, factor your budget into that, and work out the level of equipment you want to buy.

Studio Acoustics
Investing in a fully equipped podcast recording studio can be costly and isn't a viable option for most podcasters.
Instead, many hosts opt for home recording, like their home office, closet, or even a backyard shed. But, so many of these spaces aren’t well-equipped to reduce sound issues such as reverb, echoes, and other external noises.
Consider where you will be recording your podcast. In larger rooms or spaces with a lot of smooth surfaces (e.g. kitchens), there will be vocal reverb, which leads to an echo within your recording.
To help minimize this, you want to reduce the sound waves' reflection off these hard surfaces. Surround yourself with soft furnishings and add as much sound absorption as possible.
The type of room you record in will dictate the gear you should acquire, especially when it comes to microphones, stands, recording devices, and audio interfaces. The best spaces to record a podcast are small, quiet, and devoid of hard surfaces (tiles, glass, wooden floors, mirrors). They should have soft furnishings and be carpeted (or have rugs).
If your space doesn't have all of these attributes, you can always buy specialized absorptive materials, such as soundproofing squares that you can attach to the wall. Microphone isolation shields that sit behind the mic are also a good idea.
Let's Talk Gear
In theory, anyone can make a podcast with a smartphone and a laptop. And that’s the beautiful thing about podcasting. The barrier to entry is pretty low. Anyone and everyone can start their own show.
But taking the basic, watered-down approach can only get you so far. As the standard of audio quality online rises, investing in better-quality equipment has real benefits not only for you but also for your listeners.
Microphone
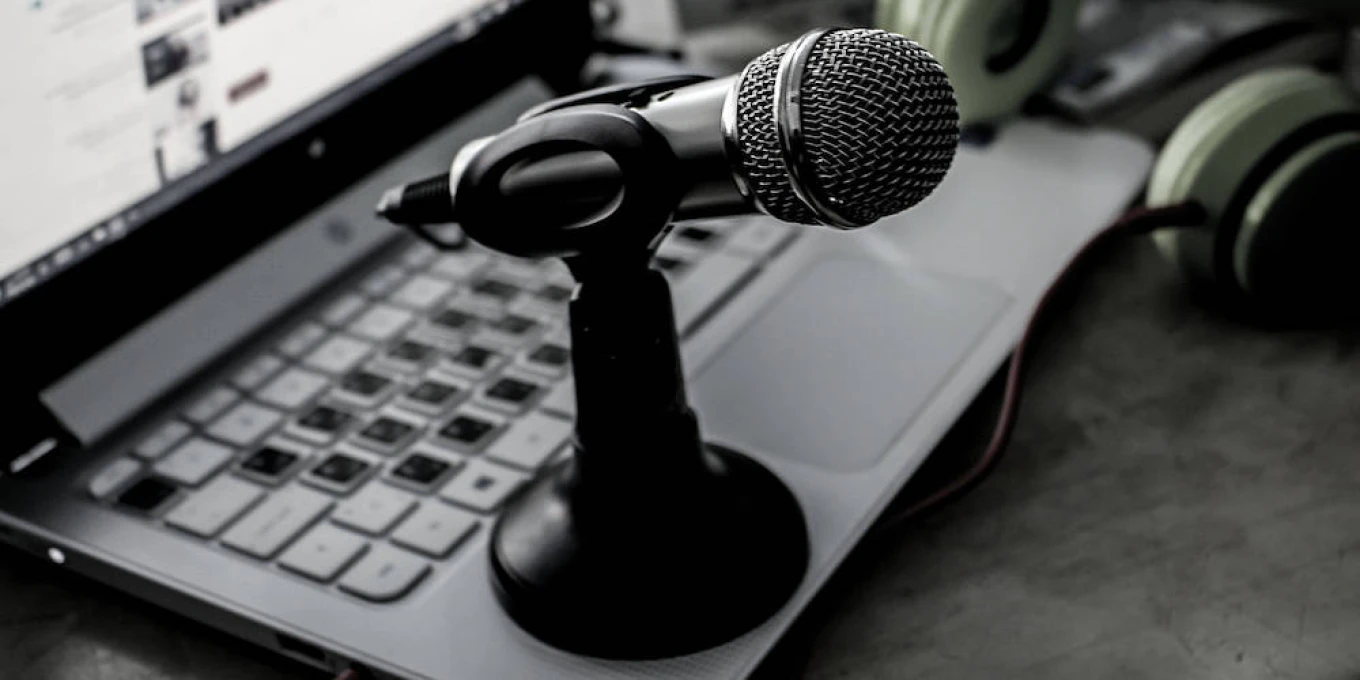
The number one piece of equipment you will need to record your podcast is a mic for each host and guest. While it's always best to go for a high-quality microphone, the term "high-quality" is relatively subjective. So, here are a few things to consider before buying a podcast mic.
There are two types of microphones: dynamic and condenser.
Generally, condenser microphones produce sound that's high quality, but they can be very sensitive. Most of them come with a shock mount that cuts out vibration, but having the right recording environment is equally essential.
Dynamic microphones are often the most cost-effective choice. They are hardier and can handle external noise at a better level than condenser mics.
Next, there's the matter of how your mic connects to the sound recording device or computer. There are two ways you can connect a mic to your computer: USB or XLR.
USB microphones that plug directly into your computer's USB port are convenient and often cost-effective. The USB options require minimal setup, are easy to install, and are also low-cost and portable, which is why budding podcasters favor them.
Investing in an XLR connection is a better choice if you're looking for higher-quality audio and need multiple microphones for guests. We recommend:
Samson Q2U
Shure MV7+ Microphone Bundle
Shure SM7dB bundle
Some podcasters find it worth investing in an XLR mic and cable for sound that's more professional and higher quality.
Further Reading: Proper Microphone Techniques & Placement Explained
Audio Interface
If you’re just getting started and are happy with a USB microphone, you don’t need an audio interface.
However, if your mic requires an XLR connection, you'll need one. This device converts analogue audio signals from your mic into digital signals that your computer can understand, giving you granular control over gain, volume, and editing flexibility.
It boosts the overall clarity of your recording equipment and allows you to plug in more than one microphone depending on the model you choose. We recommend the Scarlett Solo Interface by Focusrite. It’s simple-to-use and it makes itself at home in both novice and advanced studio setups alike.
However, if you want a more comprehensive set of studio controls, the RODECaster is an excellent option. You can connect up to four microphones and have more control via its eight programmable settings.
There are a gazillion other options available on the market, suitable for all kinds of budgets and requirements, so be sure to scour around for good deals.
If you’re looking to keep costs down, we highly recommend checking out the used market. People upgrade their gear all the time, and a decent proportion of used audio equipment is in pretty good shape.
Don’t overthink the spec sheets. The audio community is rife with debates about whether it’s possible to hear a discernable difference between the DAC chips installed in these audio interfaces. What matters is that you like how it sounds.
Windscreen or Pop Filter
Pop filters are inexpensive but necessary. Podcasters must get relatively close to the mic to ensure their voice is clear. However, getting close can create popping sounds, known as plosives.
Plosives occur when a pop of air shoots from your mouth into the mic. These sounds often arise from words with hard consonants, such as the first 'p,' 't,' 'k,' 'd', 'b,' (e.g. "podcast" or "publish) as well as some 'g' words."
A pop filter or foam mic cover fits easily onto your microphone's stand and drastically reduces pops and plosives. These filters act as a barrier between the speaker and the mic, dispersing the pop of air and stopping it from hitting the mic’s diaphragm.
Pop filters are easy to come by and incredibly cost-effective, ranging between $10 - $40. Some are upwards of $50, but this is an excessive price tag in most cases. Our advice to you is to keep it simple.
Some microphones come with built-in pop filters like the Rhode NT-USB. This mic incorporates a 'windscreen' that acts as a pop filter, helping to minimize plosive sounds during recordings.
Headphones
Headphones are understated yet crucial for podcasters. We recommend any wired headphones, and avoid Bluetooth whenever possible. Entry level and mid-tier bluetooth headphones almost always have a bit of latency, which is highly undesirable when monitoring your recordings.
Wired headphones allow you to monitor and adjust the audio in real-time, plus they stop your mic from picking up any feedback. Our favourites include the tried and true Audio-Technica ATH-M20X, Beyerdynamic DT 770 Pro, and Sennheiser HD280Pro.
The most common headphones for podcasters are the closed-back model, as they offer strong passive noise isolation to block external noise and prevent click-track or monitor bleed into sensitive microphone capsules.
Alternatively, many creators opt for In-Ear Monitors (IEMs) for a lightweight, low-profile fit that achieves excellent seal and noise attenuation without messing up hair on video streams.
Whether you choose over-ear dynamic headphones or multi-driver IEMs, look for a flat frequency response so you hear neutral, uncolored audio during tracking. Don’t blow your budget on expensive headphones. You will hit a quality ceiling beyond a certain point.

Cables: Connecting Your Gear
While starter gear like USB microphones usually comes with basic cables right in the box, expanding or upgrading your setup almost always means buying standalone cords.
Stock cables might get you out of the gate, but investing in solid, dedicated audio cables saves you from the nightmare of mid-recording crackles, stray radio signals, and mystery audio dropouts.
If you are stepping up to dynamic or condenser microphones, you will need XLR cables (the ones with the 3-pin balanced connectors) to run your voice into an audio interface or mixer.
What makes these cables special is their balanced design: two internal conductors carry inverted audio signals alongside a ground braid, effectively phase-canceling out electromagnetic and radio frequency interference before it ever reaches your headphones.
If you are plugging an audio interface or USB mic straight into your computer, you will be using USB cables. These typically run from USB-C to USB-A or USB-C to USB-C depending on what ports your laptop gives you.
One trap to avoid here: make sure any replacement USB cable you buy is explicitly rated for high-speed data transfer rather than power delivery alone. Charging-only cables look identical, but they will completely fail to pass audio signals.
Monitoring your audio directly from an interface also means getting comfortable with 1/4-inch (6.35 mm) TRS jacks. Professional gear rarely uses the small 3.5mm consumer headphone ports you find on laptops, so you will want to grab a simple 3.5mm-to-6.35mm screw-on or snap-in adapter to keep your studio headphones plugged in cleanly.
When you are picking out audio cables, a few technical specs make all the difference in build quality. Stick to a length of 6 to 10 feet for XLR runs on a standard desk setup. That gives you plenty of slack to route neatly down a boom arm without leaving a messy nest of coils that snags on your chair or picks up crosstalk.
Look for internal wires using 24 AWG or 22 AWG oxygen-free copper conductors to keep resistance minimal. If your desk is a jungle of wireless routers, extra monitors, and tangled power strips, consider star-quad cables.
Their four internal conductors are arranged in cross-wired pairs, offering up to 20 dB better noise rejection than standard cables. Look for cables wrapped in soft PVC or matte rubber jackets. They coil smoothly without keeping permanent kinks, and they absorb physical handling noise if you accidentally bump your desk.
Since cables almost always fail right where the cord meets the plug, stick with industry-standard connectors like Neutrik or Amphenol. Their heavy-duty zinc housings and internal chuck-type strain relief hold tight even if someone accidentally trips over a line.
Gold-plated contacts are also a great touch, as they resist oxidation over years of constant plugging and unplugging. For reliable mid-range workhorses that feature thick protective jackets and gold contacts without an inflated price tag, check out brands like Pig Hog, Cordial, or Roland Gold.
If you want top-tier studio wire with maximum shielding density, we recommend Mogami, Canare, and Sommer Cable. On a tighter budget, Hosa's Pro Line and GLS Audio give you great durability without overcharging.
Before you go adding items to your cart, double-check your equipment boxes to see what already came included. That said, keeping one high-quality spare XLR cable in your desk drawer is one of the smartest safety nets you can have when a line suddenly goes dark right before an interview.
Adjustable Microphone Boom Arm and Stand
This stuff is worth splurging on. Microphone stands stabilize your mic and reduce the risk of unwanted noise from knocks and bumps on the table from reaching your mic.
What you're really after when you get a boom arm is that it's easy to reposition, but also that the microphone sits in a cradle. So that if you bump the table, or stamp your foot or anything like that, the shock waves don't transfer as strongly to the microphone.
- Audio engineer, Alex Bennett
Stands and boom arms can vary in price, size, style, and robustness. As mentioned before, you have to have an idea of what your overall needs are. Will you be traveling for interviews? Will you be permanently set up in a studio? Do you need something that is highly adjustable?
When shopping for a suitable stand, consider your other gear. For example, some mic stands are way more stable than others. If you do decide to use expensive microphones and additional equipment, choose an extra-sturdy stand.
From $30 to over $200, there is something for all price points and experience levels. Some choices include:
Samson MK10 Lightweight Microphone Boom Stand for less than $30
RODE PSA1 Microphone Studio Arm for around $100
Ultimate Support MC-125 for roughly $300
Pro tip: Make sure your stand is compatible with your microphone and its accessories.
Remember, cheaper boom arms often creak and squeak when moved. Also, if they are spring-loaded, they tend to sag over time, making it challenging to keep the microphone at a reasonable distance from your mouth.
Podcast Software
Although this is an article about podcasting gear, it is worth noting that you will need to invest in some software. But, to reduce costs and save time, you should work with the podcast software that best suits your needs.
Consider how much editing you plan on doing, whether you're recording remotely or in person, your experience with this kind of software, and, of course, your budget. Having the right software can ultimately lift the quality of your sound during recording, so a bit of research is needed.
Remote recording software such as Zoom, Google Meet, or other video conferencing software will give you less flexibility than, say, Riverside or Squadcast. This is because programs like Zoom and Skype aren’t necessarily geared toward a podcaster's specific recording needs.
Riverside is a great choice as it is actually an end-to-end platform for creating video and audio podcasts, from recording and live streaming to editing, repurposing and distribution, all with the help of powerful AI.
Further Reading: How to Edit a Podcast
Hosting Recommendations
After recording and editing your episodes, you must upload them online for them to be available to listeners. A podcast hosting site is a platform that stores and distributes podcast files. These sites provide you with a podcast RSS feed, which you submit to multiple directories, such as Apple Podcasts, Spotify, Google Podcasts, Stitcher, etc.
Every time you upload and publish a new episode to your hosting site, it automatically updates all your synced directories. This form of distribution allows listeners to tune into your new content within their favorite podcast app.
With so many podcast hosting sites and services available, there's a lot to consider when choosing which one to sign up with. Price, technical support, monthly upload allowance, storage, podcast monetization, reliability, ease of use, analytic tools, and marketing features are some of the things to take into account.
Blubrry, Buzzsprout, Castos, Libsyn, Podbean, Simplecast, and Spreaker are great starter hosting sites.
They all provide monthly subscription services and vary wildly in their scope of features. It's worth diving into your overall podcasting goals to get a good idea of what you need from your hosting site and do some research before committing.
Spotify for Podcasters (previously Anchor) is an excellent free option that is relatively user-friendly. Owned by Spotify, this site is straightforward but has limited options. Unlike other host sites, you can edit on the platform, which means you can keep everything all in one place.
Of all the hosting sites we have worked with, our top suggestion for most podcasters is Transistor, especially if you have a big team or multiple shows. Its simple interface makes uploading, distributing, and monitoring episodes easy.
The data coming in matters for us, especially if we are running marketing campaigns or need a clear overview of how a podcast's content is performing.
Transistor offers detailed statistics around monthly listens, average downloads per episode, total listens per episode, which apps and devices listeners are using, and which country listeners are tuning in from. Transistor has three pricing plans:
Starter: $19/month, $190/year
Professional: $49/month, $490/year
Business: $99/month, $990/year
Read: 13 Best Podcast Hosting Platforms for All Budgets (Free to Expensive)

Beginner, Intermediate, and Expert Equipment Bundles
Buying gear can feel like a guessing game with how much you need to spend. Every equipment kit should include most or all of the items we've mentioned, but each can have a drastically varied price range. Below are three bundles for different budget ranges, including beginner, intermediate, and expert.
The quality of your equipment is not an indicator of your skill level. If your budget allows for it, buy the best you can afford. And if it doesn't, don't spread yourself too thin acquiring high-end gear that may be overkill for your use case.
The Beginner Budget Podcast Bundle
Microphone: Samson Technologies’ Q2U USB/XLR Dynamic Microphone. Both microphones produce good-quality sound and can plug straight into a computer using a USB cable. That means there is no need for a recording interface. ($70 - $90)
Mic stand: The Samson Q2U can be paired with the Samson MK-10. (Free - $25)
Recording interface: None. Microphones using USB, plug into your computer with a USB cable, so there's no need for an interface with the Samson Q2U.
Recording/editing software: Audacity offers a free multi-track audio editor. Although it's not the best option, it's great for beginner podcasters and works on both macOS and Windows (free). For recording, we also recommend Transistor or Riverside.
Headphones: While simple earbuds can be used, it's worth investing in good, over-the-ear headphones, even if you are on a shoestring budget. Audio-Technica ATH-M20X are closed-back headphones at a great price.($5 - $50)
The Intermediate "Best Value" Podcast Bundle
Microphone: As mentioned before, there are thousands of microphones to choose from. We suggest the Shure MV7x microphone bundle (with boom arm) which has both USB and XLR outputs.($269-280)
XLR Cable: In fact, for a more professional set up, we'd recommend you'd use an XLR cable. In this case we aren't partial to any brand, any XLR cable will do.
Mic stand: The Rode DS-1 desktop stand is an excellent option and compatible with this microphone. For those who prefer a boom-arm stand, the Rode PSA 1+ is our top choice.($25 - $100)
Software: Descript uses automated transcription and text-based editing tools to make editing quick and easy. It's a subscription-based software (SaaS) with different monthly prices available. There is a free version, but to make the most of their features, go with a paid plan. (Starts at $12/month)
Headphones: The Beyerdynamic DT 770 PRO are closed-back headphones that are comfortable and provide professional, first-rate sound. ($160)
Recording interface: The Scarlett Solo is your best option for an interface when you'll need it.
The Expert Podcast Bundle
Microphone: The Shure SM7Db bundle, a dynamic microphone with built-in pre-amp. This is a great professional option that cuts out the need for a pop filter. It also includes a boom-arm.
XLR Cable: Again here, we recommend using an XLR cable to connect your mic.Feel free to use any XLR cable you prefer.
Mic stand: The Shure SM7Db bundle comes with a Gator boom arm that can be attached to your desk.
Headphones: Ask any dedicated podcaster what the top-tier headphones are, and most will tell you the Beyerdynamic DT 770 PRO is still a great option - comfortable and with professional sound. ($160)
Recording interface: Again, we'd still recommend the Scarlett Solo Interface here. It's your best option for quality and price.
Software: Hindenburg Journalist is a great choice for those with some editing experience. especially those who favor working with multiple audio tracks. They have excellent customer support, plus an active online community should you need assistance.
Hindenburg has multiple pricing tiers and offers services from as little as $12 per month. But if you are a business, opt-in for the Hindenburg PRO, which starts at $200 annually ($12 - $200).
Some other favorite editors for professional-level mixing include Pro Tools and Adobe Audition. Pro Tools has the added bonus that you can edit video tracks, if you are experimenting with video podcasting (starting at $23.99 per month or $239 annually).
While it's unnecessary for most podcasters, if you plan on doing the bulk of your recording in person, you might want to check out a recording interface and digital recorder to store backups.
The Rode Rodecaster Pro has four XLR inputs, Bluetooth connection, four quarter-inch outputs for headphones, and eight programmable soundboard pads ($600).
As for a digital recorder, the Zoom H6 records up to six tracks onto an SD card. It also has a detachable microphone and four XLR microphone inputs and uses AA batteries instead of a dedicated power source ($350).
FAQs
Navigating gear specifications, setup requirements, and budget constraints can feel overwhelming when you are trying to get a show off the ground. Below, we’ve answered some common questions creators ask when building out their setups.
Whether you are wondering how much money you actually need to spend, whether your existing computer can handle the workload, or how to launch without making costly gear mistakes, we have got you covered.
How do beginners start podcasting?
Starting a podcast comes down to nailing a simple setup before scaling up. First, lock in your concept, target audience, and show format. Next, secure your core essentials: a dynamic USB microphone like the Samson Q2U, wired closed-back headphones, and a treated, quiet recording space.
Record and edit your audio using beginner-friendly tools like Audacity or Descript, then upload your episodes to a hosting platform like Transistor. Focus on creating great content first; you can always upgrade your gear as your audience grows.
How much does a podcast setup cost?
A complete podcast setup can cost anywhere from under $100 to over $1,500 depending on your production goals. Beginners can get going for around $100 using a solid USB microphone, basic headphones, and free recording software.
Mid-tier setups with XLR microphones, dedicated audio interfaces, and boom arms run between $300 and $600. Professional multi-host setups featuring top-of-the-line dynamic mics, studio recorders, and advanced software suites easily cross the $1,000 threshold.
Is a smartphone and USB mic setup too limiting?
Using a smartphone with a USB mic is not limiting for beginners; it is actually a surprisingly effective way to launch a solo show. Modern smartphones offer plenty of processing power, and when paired with a good USB microphone or mobile interface, they deliver solid audio quality.
However, this setup reaches its limits when you need to record multi-guest interviews, manage complex multi-track audio, or route signal feeds locally without hitting software and connection constraints.
What computer specs do I need for podcasting?
You do not need a top-tier gaming rig to record and edit podcast audio. Any modern computer featuring at least 8GB of RAM, a multi-core processor (Intel i5/Apple M1 or newer), and solid-state storage (SSD) can comfortably run platforms like Audacity, Descript, or Riverside.
If you plan to edit multi-track audio, record video streams, or run heavy third-party plugins, aim for 16GB of RAM and dedicated graphics processing to ensure smooth rendering and zero system lag.
Summing Up
Investing in the right recording equipment can transform your audio quality and podcast. This can pay real dividends, especially if you want to grow your business through podcasting. But, while there is a temptation to buy whatever the top of the range is at the time, it's worth identifying exactly what equipment is needed for a podcast.
Start with what’s essential and what your budget can accommodate. Remember, you can always upgrade to higher-quality microphones, headphones, and software later on.
![Proper Microphone Placement Techniques & Tips Explained [2025]](/img/containers/main/img/mic-technique.jpg/d84e74934b9e2d0861c594e840c0635e/mic-technique.webp)
![Remote Podcast Recording [2026]| Lower Street](/img/containers/main/img/record-a-podcast-remotely/record-podcasts-remotely.jpg/ba94253dc0aab7763f6c4efb054f9a8c/record-podcasts-remotely.webp)

